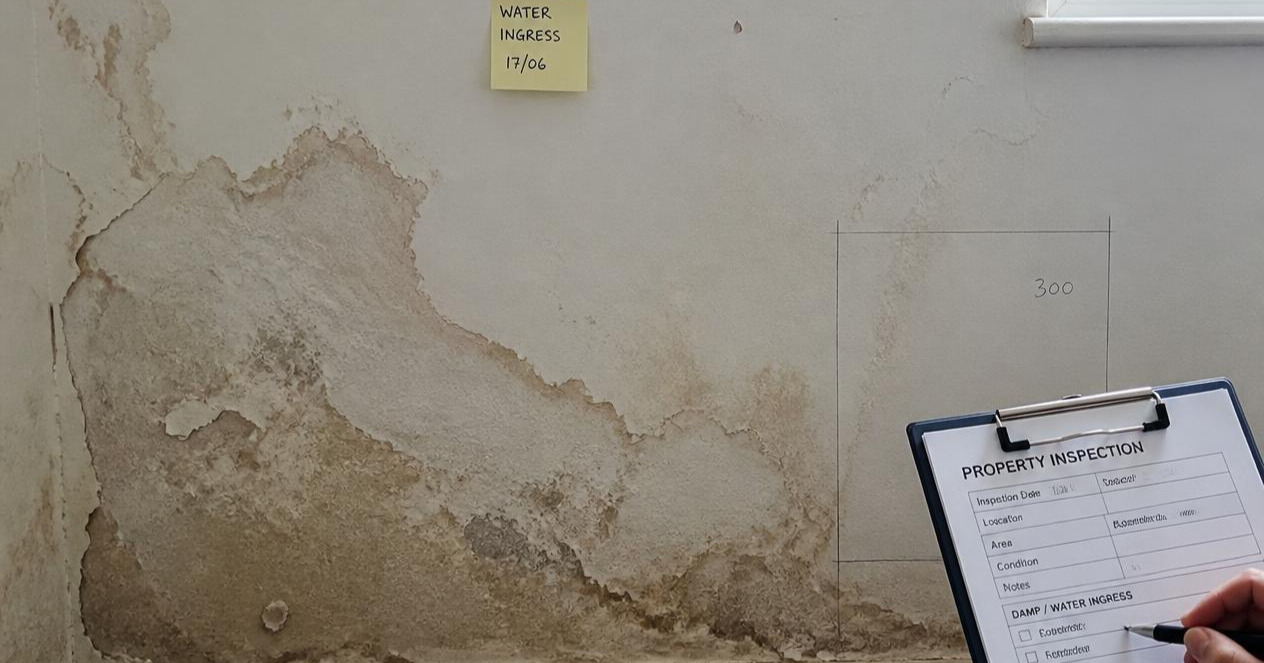
Water damage inside a wall often develops for weeks before it becomes visible on the surface — by the time you see a stain, the leak has usually already been going for a while. Knowing the early, less obvious signs of water damage in walls means catching problems while they’re still a small repair, instead of finding out once drywall, insulation, or framing has been wet for months.
Visual Signs
- Discoloration — yellow, brown, or copper-colored staining, often with a darker ring at the edge
- Peeling or bubbling paint — moisture trapped behind paint pushes it away from the wall
- Warping or bulging — a wall that no longer looks flat, especially near the floor or a window
- Visible mold — dark spots, often starting small in corners, near baseboards, or around window frames
- Efflorescence — white, powdery mineral deposits, most common on masonry or concrete walls, left behind as water evaporates through the material
- Cracking — particularly in plaster walls, as material dries unevenly after getting wet
Signs You Can Feel, Not Just See
- Soft or spongy texture when pressed gently — a clear sign the material behind the surface has absorbed water
- Cooler temperature in a specific spot compared to the surrounding wall — moisture evaporating pulls heat with it, so a damp patch often feels noticeably cooler to the touch
- Warped baseboards or trim that no longer sit flush against the wall
Signs You Can Smell
A persistent musty or earthy odor is one of the most reliable early indicators of water damage in walls — often showing up well before any visible sign, especially if the moisture is inside the wall cavity rather than on the visible surface. If a room smells damp but looks fine, that’s worth investigating rather than dismissing.
Where to Actually Look
Water damage in walls tends to concentrate in predictable spots:
- Around windows and doors — failed caulking or flashing lets water in during rain
- Behind and below plumbing fixtures — bathrooms and kitchens, particularly around sinks, tubs, and toilets
- Where exterior walls meet the roofline — a common entry point for roof leaks to travel down inside a wall cavity before showing up lower down
- Behind large appliances — washing machines, dishwashers, refrigerators with ice makers
- Along the bottom of walls near flooring — since water travels downward, damage often shows up at the base of a wall even when the source is higher up or elsewhere entirely
- Basement and below-grade walls — susceptible to groundwater seepage even without a specific leak
Old Damage vs. Active Leak: How to Tell the Difference
- A dry, tan or light brown stain with a defined edge that doesn’t change over time usually indicates a past leak that’s already been resolved — though the wall material itself may still need repair even if the leak is gone
- A dark, spreading, or growing stain almost always means an active source
- Press the area — if it’s still soft or damp to the touch, water is either still coming in or the material hasn’t fully dried since the last event
- Check again after dry weather — if a stain reappears or darkens specifically after rain, that points to an active source tied to weather, like a roof or window leak
Tools That Help Confirm What You’re Seeing
- A moisture meter — inexpensive and gives an objective reading rather than relying on touch or smell alone; compare the reading against an unaffected section of the same wall
- A thermal camera (or a thermal camera attachment for a smartphone) — can reveal temperature differences that indicate moisture behind a surface, useful for spotting damage that isn’t visible yet
When to Act Immediately vs. When to Monitor
Act now if:
– The wall is actively wet or dripping
– There’s visible mold
– The area is soft, sagging, or growing
– The damage is near electrical outlets or wiring
Reasonable to monitor for a short period if:
– The stain is dry, small, and hasn’t changed in appearance over a few weeks
– There’s no smell, softness, or visible mold
– You’ve confirmed (or strongly suspect) the original source has already been fixed
Even in the “monitor” case, it’s worth having it assessed within a reasonable timeframe rather than leaving it indefinitely — a resolved-looking stain doesn’t guarantee the material behind it dried out properly.
What to Do Once You’ve Confirmed Damage
Once you’ve identified signs of water damage in a wall, the next steps are finding and stopping the source, then assessing whether the affected material can be dried and kept or needs replacing — see our guides on water damage drywall and how to fix water damaged walls for what comes after detection.
The Takeaway
The earliest signs of water damage in walls are rarely dramatic — a faint musty smell, a slightly cool patch, a stain that’s easy to dismiss as old. Catching it at that stage, rather than waiting for visible sagging or mold, is what keeps a repair small. When in doubt, a five-minute check with a moisture meter is far cheaper than finding out later that a stain had been active for months.