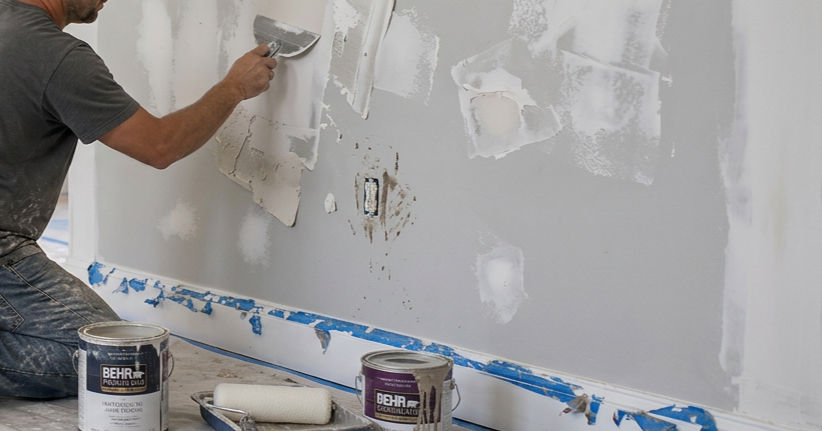
Once you’ve confirmed a wall is dry enough to work on and doesn’t need a full section replaced (see our guide on assessing water-damaged drywall if you’re not sure yet), fixing it is a fairly standard sequence — whether it’s drywall, plaster, or just painted surface staining. Here’s the process from start to finish.
Before You Start: Confirm It’s Actually Ready to Repair
Don’t skip this step. Repairing over a wall that isn’t fully dry is the most common mistake in DIY water damage repair, and it usually shows up weeks later as bubbling paint, a returning musty smell, or mold. Before doing anything else:
- Press gently on the affected area — it should be firm, not soft or spongy
- If you have a moisture meter, compare the reading to an unaffected section of the same wall
- If the wall was exposed to anything other than clean water (appliance discharge, sitting water, sewage), get that assessed before proceeding — contamination isn’t something a repaint solves
What You’ll Need
- Mild bleach solution (1 part bleach to 10 parts water) or a mold-specific cleaner
- Stain-blocking primer (this is not optional — regular primer will not fully block a water stain)
- Drywall compound and mesh tape (if there’s any cracking or texture damage)
- Fine-grit sandpaper
- Paint matching the existing wall color/finish
For sections that need patching rather than just resurfacing, you’ll also need a replacement piece of drywall cut to size, drywall screws, and a utility knife.
Step 1: Clean the Surface
Wipe down the affected area with the bleach solution to kill any surface mold spores and remove residue. Let it dry completely — this can take a few hours depending on humidity, and rushing to the next step before it’s fully dry will undermine the primer’s effectiveness.
Step 2: Assess for Cracking or Texture Damage
Water damage often leaves the wall surface slightly uneven — minor cracking, a rough or flaky texture where paint has bubbled. For minor cases, a thin layer of drywall compound smoothed over the area and sanded once dry will even out the surface before priming.
Step 3: Cut Out and Patch (If Needed)
If part of the wall is soft, crumbling, or was already identified as needing replacement:
- Cut out the damaged section with a utility knife, following the studs on either side for a clean edge to attach the patch to
- Check the wall cavity behind it — if insulation is wet, replace it before closing the wall back up
- Cut a replacement drywall piece to fit and screw it into the studs
- Apply mesh tape over the seams
- Apply 2–3 coats of drywall compound over the tape, sanding lightly between coats, allowing full drying time between each
Step 4: Prime
Use a stain-blocking primer over the entire repaired area — not just the patched section, but slightly beyond it, since water stains have a tendency to bleed through paint at the edges of a repair if the primer coverage doesn’t extend far enough. This is the step most DIY repairs skip or shortcut, and it’s usually why a stain reappears weeks after painting.
Step 5: Paint
Once the primer is fully dry, paint to match. For a patched section on an otherwise painted wall, feathering the paint slightly beyond the patch (rather than a hard cutoff line) usually blends better, especially with satin or eggshell finishes where sheen differences are more visible than with flat paint.
Plaster Walls: What’s Different
Older homes with plaster (rather than drywall) walls follow a similar overall process, but plaster repair typically uses a plaster-specific patching compound rather than standard drywall joint compound, since plaster has different flexibility and adhesion characteristics. Plaster is also more prone to hairline cracking as it dries out after water exposure — this is normal for minor cases and can usually be addressed with the same compound-and-sand approach, but extensive cracking is a sign the plaster’s bond to the lath behind it may have failed, which is a job for a plaster specialist rather than a general DIY repair.
Common Mistakes That Lead to Repeat Problems
- Painting over a wall that isn’t fully dry — traps moisture in, often leading to bubbling or mold within weeks
- Skipping the stain-blocking primer — regular primer or paint alone will not reliably block a water stain long-term
- Not checking behind the wall — a wall that looks fine on the surface can still have wet insulation or framing behind it if the water event was significant
- Repairing without fixing the source — if the leak that caused the damage isn’t actually resolved, the repair is temporary no matter how well it’s done
When to Call a Professional Instead
- The damage covers a large area or multiple walls
- There’s any sagging, crumbling, or visible mold
- The water source was anything other than clean water
- You’re dealing with plaster and the cracking is extensive, not just surface-level
The Takeaway
Fixing a water-damaged wall is a manageable weekend project once you’re confident it’s actually dry and the underlying leak is resolved — the sequence (clean, patch if needed, stain-blocking primer, paint) doesn’t change much between drywall and plaster. The primer step is the one most likely to get skipped and the one most likely to cause the repair to fail if it is.