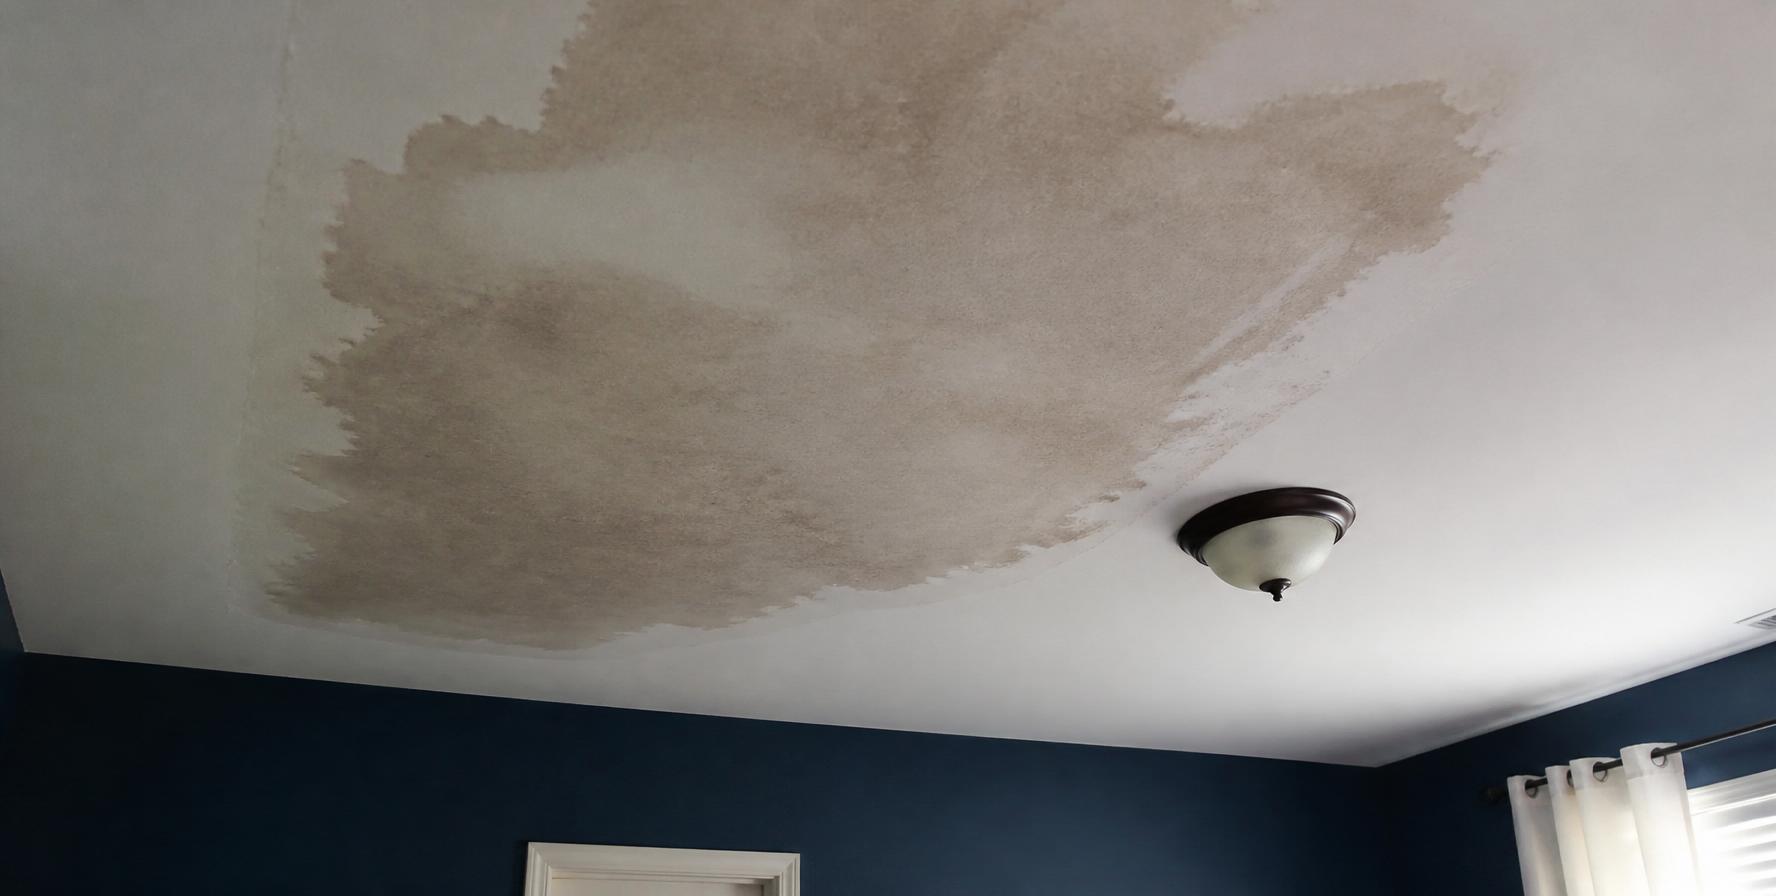
A water stain on the ceiling is never just a cosmetic problem. It’s a sign that water has found its way past your roof or plumbing and into the structure of your home, and the longer it sits, the more it costs to fix. Ceiling water damage repair typically involves three stages: stopping the source of the leak, drying out the affected area, and repairing or replacing the damaged material — usually drywall, plaster, or insulation.
This guide walks through how to identify the damage, decide whether you can handle it yourself, and understand what a repair is likely to cost before you call anyone out.
Signs Your Ceiling Has Water Damage
Ceiling damage doesn’t always show up as an obvious puddle. Most homeowners notice one or more of these signs first:
- Yellow or brown stains with a ring-shaped border — the classic sign of a slow, ongoing leak
- Sagging or bulging drywall — water has soaked into the material and it’s losing structural integrity
- Peeling or bubbling paint — moisture trapped behind the paint layer is pushing it away from the surface
- A musty smell in the room, even if you can’t see a stain yet
- Soft spots when you press gently on the ceiling (use a broom handle, not your fingers, if you suspect the area is weak)
- Visible mold, often grey, black, or greenish, especially in bathrooms or near vents
A fresh, dark stain usually means an active leak. A dry, tan-colored stain is often from a leak that’s already been fixed but never cleaned up. Either way, the ceiling material itself may still need repair.
What Causes Ceiling Water Damage
Before repairing anything, you need to find and stop the source. Common causes include:
- Roof leaks — damaged or missing shingles, cracked flashing around chimneys and vents, or clogged gutters causing water to back up
- Plumbing leaks — a pipe running through the floor above, often behind a wall or under a bathroom
- HVAC condensation — a clogged condensate line from an air conditioning unit in the attic
- Bathroom and kitchen leaks — a leaking shower pan, toilet seal, or dishwasher on the floor above
- Ice dams — in colder climates, melting snow refreezing at the roof edge and forcing water back under shingles
If you can’t immediately identify the source, it’s worth having a roofer or plumber inspect before you patch the ceiling — repairing the drywall without fixing the leak means you’ll be doing it again in a few months.
Water Damage Categories: Why the Type of Water Matters
Professional restorers classify water damage using the IICRC S500 standard, which groups water into three categories based on contamination level:
- Category 1 (clean water) — from a supply line, sink overflow, or rainwater. Low health risk if addressed quickly.
- Category 2 (grey water) — from appliances like washing machines or dishwashers, or clean water that’s sat for a day or more and started to degrade. Contains some contaminants.
- Category 3 (black water) — from sewage backups or floodwater. Contains pathogens and shouldn’t be handled without professional protective equipment.
This matters for a ceiling leak specifically: a Category 1 leak from a clean supply line is a reasonable DIY candidate once it’s dry, but Category 2 or 3 water — even in a small, contained stain — is worth having a professional assess, since the contamination risk doesn’t shrink along with the size of the patch.
Is a Water-Damaged Ceiling Dangerous?
In most cases, a stained ceiling is a repair job, not an emergency. But there are situations where you should treat it as urgent:
- Sagging that’s visibly getting worse — this can indicate the drywall is close to collapsing, especially if it’s holding standing water
- Water dripping steadily — active dripping means the material above is saturated
- Exposed electrical fixtures near the damage — water and electrical wiring is a genuine safety risk; shut off power to the circuit if there’s any doubt
- A strong, persistent musty odor — often a sign mold has already started growing inside the cavity, not just on the surface
If the ceiling is actively dripping or sagging heavily, place a bucket underneath, avoid the area, and address it the same day rather than waiting. Timing matters more than most homeowners expect: the EPA notes that mold can begin growing on a wet surface within 24–48 hours, so a leak left over a weekend is already past the point where a quick wipe-down is enough.
DIY Repair vs. Calling a Professional
Whether you can repair the ceiling yourself depends on the extent of the damage.
You can likely DIY if:
- The stain is small (under a foot or two across) and the leak has already been fixed
- The drywall isn’t sagging or soft to the touch
- There’s no visible mold growth
- You’re comfortable with basic drywall repair (patching, sanding, painting)
Call a professional if:
- The damage covers a large area or multiple rooms
- The ceiling is sagging or soft
- You can see or smell mold — the EPA generally recommends professional remediation once mold covers more than about 10 square feet (roughly a 3×3-foot patch)
- The source of the leak isn’t obvious
- The damage is near electrical wiring or fixtures
A basic stain-only repair is a weekend project for most homeowners. Anything involving structural drywall replacement, insulation, or mold remediation is worth bringing in a licensed water damage restoration contractor.
How to Repair a Water-Stained Ceiling (Step by Step)
For a surface-level stain where the leak has already been resolved and the drywall is still solid:
A note on materials: most ceilings built after the 1950s use drywall, the same material as walls. Older homes sometimes have plaster ceilings instead — the process below still applies, but use a plaster-specific patching compound rather than standard drywall joint compound.
Safety first: ceiling work means debris and dust fall down onto you rather than away, so wear safety glasses and an N95 (or better) dust mask throughout — especially when sanding or cutting into the drywall, since dried mold spores can become airborne once disturbed. Rubber gloves are worth it too when handling the bleach solution.
- Confirm the drywall is dry. Press gently — if it’s firm and not spongy, it’s likely safe to repaint over. If you have a moisture meter, the benchmark restoration pros use is comparing the reading against an unaffected patch of ceiling nearby — once the two are close, the material is considered dry.
- Clean the area with a mild bleach solution (1 part bleach to 10 parts water) to kill any surface mold spores, then let it dry fully.
- Apply a stain-blocking primer — regular paint will not fully cover a water stain, and the stain will bleed through over time without a sealing primer.
- Sand and smooth any peeling paint or minor texture damage.
- Repaint to match the surrounding ceiling.
If the drywall itself is damaged (soft, crumbling, or sagging), the repair goes further:
- Cut out the damaged section back to solid, dry material.
- Check and, if needed, replace any wet insulation above the ceiling line.
- Install a new drywall patch, sized to fit the cut-out area.
- Tape, mud, and sand the seams over 2–3 coats, allowing drying time between each.
- Prime with a stain blocker and paint to match.
What Ceiling Water Damage Repair Costs
Costs vary widely depending on the extent of the damage and whether structural material needs replacing.
| Type of Repair | Typical Cost Range |
|---|---|
| Minor stain (clean, prime, repaint) | $150 – $400 |
| Drywall patch (up to ~16″×16″) | $300 – $470 |
| Larger drywall section / full water-damaged ceiling repair | $600 – $1,550 |
| Full ceiling replacement with insulation | $2,000 – $4,400+ |
| Add mold remediation | $1,200 – $3,750 (national average around $2,370) |
These ranges are broadly consistent with 2026 cost data published by Angi and HomeAdvisor. They reflect materials and labor for the ceiling repair itself — they don’t include fixing the underlying cause (a new roof section, re-piping, or HVAC repair), which is typically billed separately by the roofer or plumber.
Regional labor rates, ceiling height, and access (a two-story great room ceiling costs more to work on than a standard 8-foot bedroom ceiling) will all move these numbers.
Will Insurance Cover Ceiling Water Damage?
It depends on the cause. The Insurance Information Institute (III) — the industry’s main source of consumer insurance guidance in the US — notes that homeowners policies generally distinguish between sudden, accidental damage and damage from neglect or gradual wear.
- Usually covered: A pipe that bursts suddenly, storm damage to the roof that lets water in, or an appliance failure (like a washing machine hose bursting)
- Usually not covered: Damage from a slow leak you knew about (or should have known about) and didn’t fix, or damage caused by lack of maintenance, such as a rotted roof
- Flood damage (rising groundwater) is typically excluded from standard policies and requires separate flood insurance
Document the damage with photos before starting any repair, and contact your insurer early if the cause was sudden — most policies have windows for reporting claims. Keep receipts for any temporary repairs, like a tarp on the roof, as these are often reimbursable.
Preventing Future Ceiling Water Damage
- Inspect your roof annually, or after major storms, for missing or damaged shingles
- Clean gutters at least twice a year to prevent water backing up under the roofline
- Check appliance hoses and connections (washing machines, dishwashers) for wear every year or two
- Service your HVAC system annually, including clearing the condensate drain line
- Fix small leaks immediately — a slow drip today is a ceiling repair bill in six months
The Takeaway
A water-stained or damaged ceiling is almost always fixable, but the repair only holds if the source of the water is dealt with first. For a simple stain with no structural damage, a weekend DIY job with a stain-blocking primer will usually do it. For anything involving soft drywall, sagging, or visible mold, it’s worth getting a professional assessment — both for the repair itself and to make sure there isn’t hidden damage in the insulation or framing above.