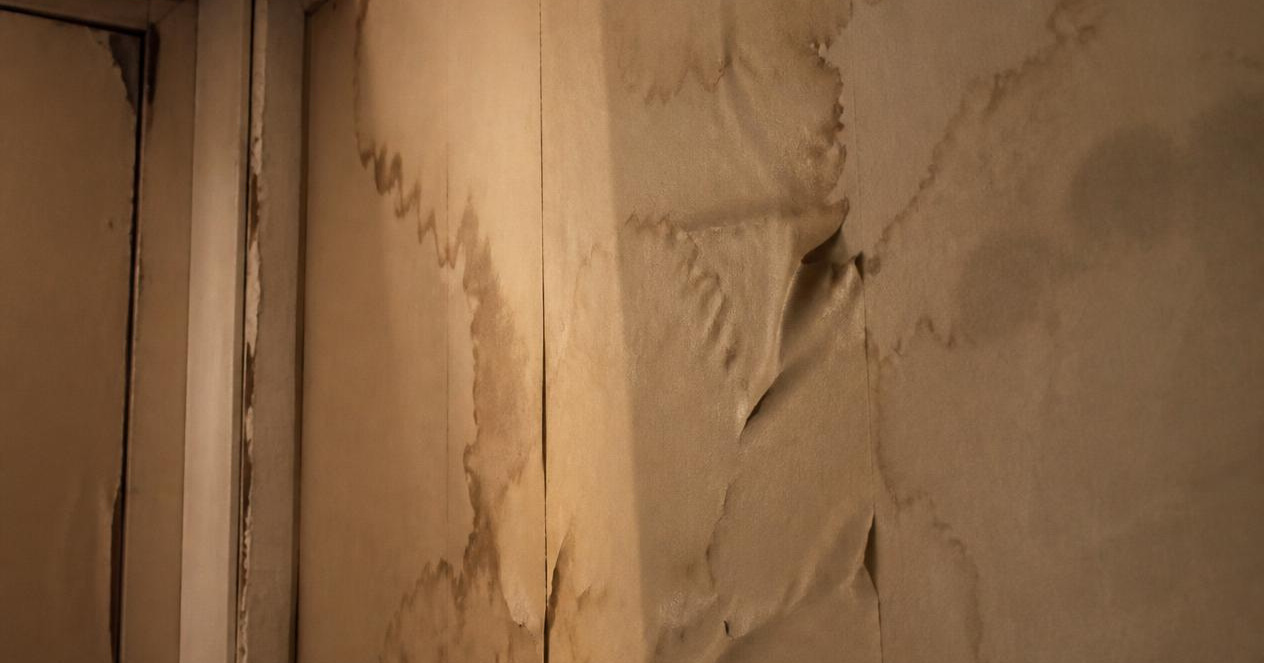
Drywall is one of the more common water damage casualties in a home, and also one of the most misunderstood — homeowners often assume any wet drywall needs to be torn out, when in some cases it can be dried and kept. The deciding factors aren’t really about how bad it looks; they’re about how long it was wet, what kind of water it was, and whether the paper facing has started to break down.
How Drywall Reacts to Water
Standard drywall is gypsum board sandwiched between two layers of paper. Gypsum itself can absorb and release water without permanent damage in mild cases — the bigger risk is the paper facing, which softens and eventually breaks down when saturated, and which mold can colonize far more easily than the gypsum core itself. That’s why drywall damage tends to be judged by the paper’s condition, not just moisture content.
Signs Drywall Has Water Damage
- Discoloration — yellow, brown, or tan staining, usually spreading outward from the source
- Bubbling or peeling paint
- Soft or spongy texture when pressed gently
- Sagging — a clear sign the material has absorbed significant water and lost structural integrity
- Visible mold — often first appearing at seams, corners, or around outlets
- A swollen or warped feel along the edges of a panel
Can This Drywall Be Saved? A Decision Framework
Likely salvageable (dry in place):
– The water was Category 1 (clean — a supply line, rainwater, an appliance supply hose)
– It’s been wet for less than 24–48 hours
– The drywall is still firm to the touch, not soft or sagging
– No visible mold
Likely needs replacing:
– The water was Category 2 or 3 (appliance drain water, sitting water, sewage, floodwater) — even if the drywall looks intact, contaminated water inside a porous material like gypsum board is difficult to fully decontaminate, and industry guidance generally treats Category 2/3-affected porous materials as non-salvageable
– The drywall is soft, sagging, or crumbling
– Visible mold growth
– It’s been wet for more than about 48 hours without active drying
– It’s insulated wall/ceiling cavity drywall where the insulation behind it is also wet — drying the drywall alone doesn’t solve a wet cavity
This is the same logic restoration professionals use: Category and time-to-dry matter more than surface appearance.
Drying Drywall in Place (When It’s a Reasonable Candidate)
- Stop the water source first — drying while still wet is pointless.
- Remove standing water and excess moisture around the base of the wall.
- Increase air circulation — fans directed at the surface, not just general room airflow.
- Run a dehumidifier continuously in the room — intermittent use significantly slows drying.
- Check moisture levels periodically with a moisture meter, comparing against a dry section of the same wall, rather than judging by touch alone.
- Allow 2–4 days minimum for a full dry-out before assuming it’s safe to paint over — painting over drywall that’s still damp traps moisture and often leads to mold or bubbling later.
If it’s not measurably drying (moisture readings staying flat over 2–3 days), that’s usually a sign water is still getting in from somewhere, or that the cavity behind the drywall is holding moisture the surface drying isn’t reaching.
When Replacement Is the Right Call
Replacing damaged drywall involves:
- Cutting out the affected section back to solid, dry material (typically to the nearest stud on each side)
- Checking and replacing wet insulation behind it, if present
- Installing a new drywall patch
- Taping, mudding, and sanding the seams (usually 2–3 coats with drying time between each)
- Priming with a stain-blocking primer if there was any staining, then painting
For anything beyond a small patch, or where mold is present, this is generally worth bringing in a professional — both for the repair quality and because mold-affected material removal has specific handling considerations (containment, disposal) that are easy to get wrong doing it yourself.
What It Costs
| Situation | Typical Cost |
|---|---|
| Dry-in-place (equipment rental, no material replacement) | $50 – $200 |
| Small patch, minor repairs | $150 – $400 |
| Partial replacement (moisture-damaged section) | $400 – $800 |
| Larger section, reaching framing/insulation | $800 – $1,200+ |
| Add mold remediation | $1,200 – $3,750 (national average around $2,370) |
Figures broadly consistent with 2026 data from Angi and HomeAdvisor.
Preventing Repeat Drywall Damage
- Fix leaks (roof, plumbing, appliance) as soon as they’re noticed — drywall damage compounds quickly the longer water sits
- In bathrooms and kitchens, consider moisture-resistant drywall (“green board” or cement board) for areas prone to splashing or humidity
- Check behind large appliances (washing machines, water heaters) periodically, since leaks there often go unnoticed until the drywall shows staining
The Takeaway
The paper facing, not the gypsum core, is usually what decides whether water-damaged drywall can be dried and kept or needs to come out — combined with how contaminated the water was and how long it sat. When those factors line up favorably (clean water, caught early, no sagging), drying in place is a legitimate option and cheaper than replacement. When they don’t, replacing the section is faster and more reliable than trying to salvage material that’s already compromised.